Install Squid Report Generator Webmin
This how-to explains how to install the current version of Squid Proxy on a CentOS 7 VM with Webmin, Apache, and SARG with update support from repositories.. as well as how to include easy to use whitelists and blacklists. It also covers how to enforce the use of the proxy server via Group Policy and for Internet Explorer and third party browsers such as Firefox.
There are no formatting options, but I tried to make it as readable as possible. Pound symbols (#) mean to enter what's after it in the terminal.
Cluster Webmin Servers: cluster-webmin.wbm.gz: Install and manage modules, themes, users, groups and access control settings across multiple Webmin servers. Squid Report Generator. A tool for generating reports from Squid access logs. All except Windows: System Documentation: man.wbm.gz: View man pages, HOWTOs and other package.
28 Steps total
Step 1: Install CentOS 7
Install the latest version of CentOS 7. The basic install, no gui. I believe this is the default option.
Step 2: Run Updates
1. # yum -y update
2. Reboot (# shutdown -r now)
Step 3: Install Hyper-V or VMWare Tools
1. Hyper-V
--------a. Insert LIS disc
--------b. # mount /dev/cdrom /mnt
--------c. # cp –r /mnt /root/lis
--------d. # chmod –R 0775 /root/lis
--------e. # cd /root/lis/RHEL71
--------f. # ./install.sh
--------g. Note: If you install the incorrect version, you can remove it by performing the following:
----------------1. # rpm -qa grep microsoft
----------------2. # rpm -e
2. VMWare Tools: (requires perl and net-tools… so skip ahead and do steps 4, 5, 6, 7, and 8 first… then come back to here)
--------a. Do steps 4, 5, 6, 7, and 8 first.
--------b. Insert vmware tools disc.
--------c. # mount /dev/cdrom /mnt
--------d. # cp -r /mnt /root/vmwaretools
--------e. # cd /root/vmwaretools
--------f. # tar -xvf VMwareTools-9.0.15-2323214.tar.gz (adjust if needed)
--------g. # cd vmware-tools-distrib
--------h. # ./vmware-install.pl -d
3. Reboot. (# shutdown –r now)
Step 4: Add Squid Repository
1. Type the following line below, and copy what's below that with vi. In the VI editor, hit i to edit. Hit escape to when done typing, then Shift+ZZ to save.
2. # vi /etc/yum.repos.d/squid.repo
[squid]
name=Squid repo for CentOS Linux - $basearch
baseurl=http://www1.ngtech.co.il/repo/centos/$releasever/$basearch/
failovermethod=priority
enabled=1
gpgcheck=0
Step 5: Install Squid
1. # yum –y install squid
2. Open firewall connection:
--------a. # firewall-cmd --zone=public --add-port=3128/tcp --permanent
--------b. # firewall-cmd --reload
**Note: In most of the 'firewall-cmd' commands, there are double-dashes (--).
Step 6: Add Webmin Repository
1. Type the following line below, and copy what's below that with vi. In the VI editor, hit i to edit. Hit escape to when done typing, then Shift+ZZ to save.
2. # vi /etc/yum.repos.d/webmin.repo
[Webmin]
name=Webmin Distribution Neutral
baseurl=http://download.webmin.com/download/yum
enabled=1
Step 7: Install Webmin
1. # rpm --import http://www.webmin.com/jcameron-key.asc
2. # yum update
3. # yum -y install openssl openssl-devel
4. # yum -y install perl perl-Net-SSLeay perl-Crypt-SSLeay
5. # yum -y install webmin
6. # firewall-cmd --zone=public --add-port=10000/tcp --permanent
7. # firewall-cmd --reload
8. # chkconfig webmin on
9. Now you can access Webmin via https://proxy-server:10000
--------a. If for some reason you cannot access via https and you get an error like: SSL _rx_record_ size error message.. then do this:
----------------1. # nano /etc/webmin/miniserv.conf
----------------2. Change ssl=1 to ssl=0
----------------3. Save changes
----------------4. # /etc/init.d/webmin restart
----------------5. Now you can connect via http://server:10000
**Note: In most of the 'firewall-cmd' commands, there are double-dashes (--).
Step 8: Install Net-tools (needed for VMWare Tools)
1. # yum -y install net-tools
2. Now at this point, you can go back to install vmware tools if needed
Step 9: Install Apache
** Note: Apache is needed to host the .pac file for proxy clients. Normally, you'd host this on a web server separate from your proxy server. That way, if your proxy server goes down, the .pac file can still be accessed by clients. The .pac file tells client computers what to do proxy-wise. Like, if proxy goes down, use a different proxy server or bypass proxy. That said, for the purposes and ease of this How-to, I'll say how to install on the proxy server:
1. # yum -y install httpd
2. # firewall-cmd --permanent --zone=public --add-service=http
3. # firewall-cmd --permanent --zone=public --add-service=https
4. # firewall-cmd --reload
5. # systemctl start httpd.service
6. # systemctl enable httpd.service
**Note: In most of the 'firewall-cmd' commands, there are double-dashes (--).
Step 10: Upload Squid Block Lists
1. Log in to webmin
2. Under “Others”, click Java File Manager (or File Manager)
3. Browse to /etc/squid
4. Make a /etc/squid/blacklists directory
5. Upload your Squid Black Lists: (whatever blacklists you may have, I just use the first one)
--------a. Squid-all.tar.gz
--------b. Bigblacklist.tar.gz
6. Extract bigblacklist.tar.gz in the /etc/squid directory (this will make a blacklists directory if you haven’t done so)
7. Extract squid-all.tar.gz in the /etc/squid/blacklists directory
**Note: I cannot post links to the blacklists I use because we're paying for them at http://http://www.squidblacklist.org. However, what you can do, if you want, is block all top-level domain names such as .com, etc. This will effectively block all websites except what you explicitly white-list in the steps below. I find this route easier. It's easier block everything except what's needed, which you'd just easily and simply add the domain you want to allow in the white-list.
It's also easy to allow whatever you want, and manually block it using the manual block list we set up. If you follow this how-to, you'll have a working white list and block list you can easily configure, even if you don't use any squid-black-lists in the above steps.
Step 11: Upload Squid White List (squid-whitelist.acl)
1. Upload the following squid white-list file to /etc/squid
https://gist.github.com/tjgruber/02ce85fe4f54243c45e4
2. Make sure the file name is: 'squid-whitelist.acl'
**Note: The above White List was configured by me to allow all Office 365 communications through such as Outlook, Office update, Skype for Business, and everything else Office 365 related.
The white list also allows TeamViewer and Paylocity.
Simply remove from the list anything you wish not to allow.
Step 12: Upload Squid Manual Black List (squid-manual-blacklist.acl)
1. Upload the following squid manual black-list file to /etc/squid
https://gist.github.com/tjgruber/0332a736b2e9e1278c48
2. Make sure the file name is: 'squid-manual-blacklist.acl'
**Note: The above black list only contains a facebook entry to get you started. Because I am blocking everything except what's whitelisted, it makes sense this file would be blank.
Step 13: Configure Block List Permissions
1. # chmod -R 0775 /etc/squid/blacklists
2. # chown -R root:squid /etc/squid/blacklists
3. Also do this for squid-whitelist.acl and squid-manual-blacklist.acl.
Step 14: Configure Squid
It is easier to edit the squid config file in a text editor such as notepad++ first, and then just copy and paste everything to the config file using Webmin and saving it there.
Below is the squid configuration file (squid.conf):
https://gist.github.com/tjgruber/c69e3c97ebe837a12691
Go over each line in the squid.conf file. Edit it to fit your environment needs.
1. Log in to Webmin
2. Click Servers > Squid Proxy Server
3. Click “Edit Configuration Files”
4. Edit config file as desired
--------a. Edit as necessary and/or copy/paste the above linked config file. The above config file incorporates the paid “squid-all.tar.gz” block list.
5. Save
6. In Miscellaneous Options, set “Default domain” to “.your.domain.”
7. Save (do NOT turn squid on yet)
8. Do NOT NOT NOT turn on squid yet.
**Note: (important!) In the above squid.conf file, if are not using one of the .acl block lists, you MUST comment it out along with it's associated http_access entry further down in the config file.
For example, if you are not using any of the pre-configured blocklists I included in my squid.conf file, then you need to comment out everything in the section labeled 'Custom ACL DOMAINS Block Lists' on line 34. You will also need to comment out the ones listed under the section labeled 'Custom ACL EXPRESSIONS Lists' below line 69 (just line 72 since there's only one entry).
Then you also need to comment out the associated http_access lines further down in the config file.
Do not comment out the squid manual blacklist and whitelist lines.
Step 15: Install Squid Cache Manager
For some reason, the cachemgr.cgi file is not installed with latest version of squid (3.5.16 at the time of this writing). So we’ll need to manually copy that file to the squid proxy server. Below is the file, you need to rename it to cachmgr.cgi. If anyone knows a better place to host it, please let me know!
http://www104.zippyshare.com/v/DdrJoQU8/file.html
1. In webmin, upload cachemgr.cgi to /usr/lib64/squid
2. Click on Webmin > Squid Proxy Server > “Module Config” (it's a text link located in top left corner)
3. Change “Squid cachemgr.cgi executable” to the following path: /usr/lib64/squid/cachemgr.cgi
4. Click Save.
Step 16: Initialize Cache
At the top of the Squid Proxy Server page in Webmin, click “Initialize Cache” button, make sure it says squid user.
Step 17: Start Squid
1. Click Servers > Squid Proxy Server
2. Click Start Squid button at bottom
It typically takes a minute or so to start
Step 18: Start Squid on boot
At this point, Squid should be up and running. Depending on whether or not you have any domain blocking turned, it should be blocking domains and caching. If all is well, proceed.
1. # systemctl enable squid.service
If for some reason squid doesn't start at boot, in Webmin, go to System > Bootup and Shutdown. Find squid.service, and set it there to start now and on boot (check box and click button at bottom of page).
Step 19: Set up .PAC file for deployment
Below is a link to the proxy.pac file I used:
https://gist.github.com/tjgruber/3ed9f6dd598193e01144
1. Upload the proxy.pac file to /var/www/html
**Note: As explained in STEP 9, You should preferably upload this file to your designated web server. However, you may use the proxy server temporarily to get thing up and running nicely and easily change it later, as it's a simple GPO edit.
Make sure to edit the proxy.pac file to fit your environment.
Step 20: Upload index.html for Apache
Upload the following index.html file to /var/www/html.
You can do this via Webmin > Others > File Manager
https://gist.github.com/tjgruber/ba5e2895d700bc90f982
Step 21: To Edit custom manual white/black lists and other squid config files
1. Edit black/white lists through Webmin > Servers > Squid Proxy Server > Edit Configuration Files
2. At the top, select the config file (blacklist) to edit: click Change button.
You should only be editing the Whitelist and Manual Blacklist files manually: (they are at the bottom of the drop-down list)
/etc/squid/squid-manual-blacklist.acl
/etc/squid/squid-whitelist.acl
3. Click Save when finished.
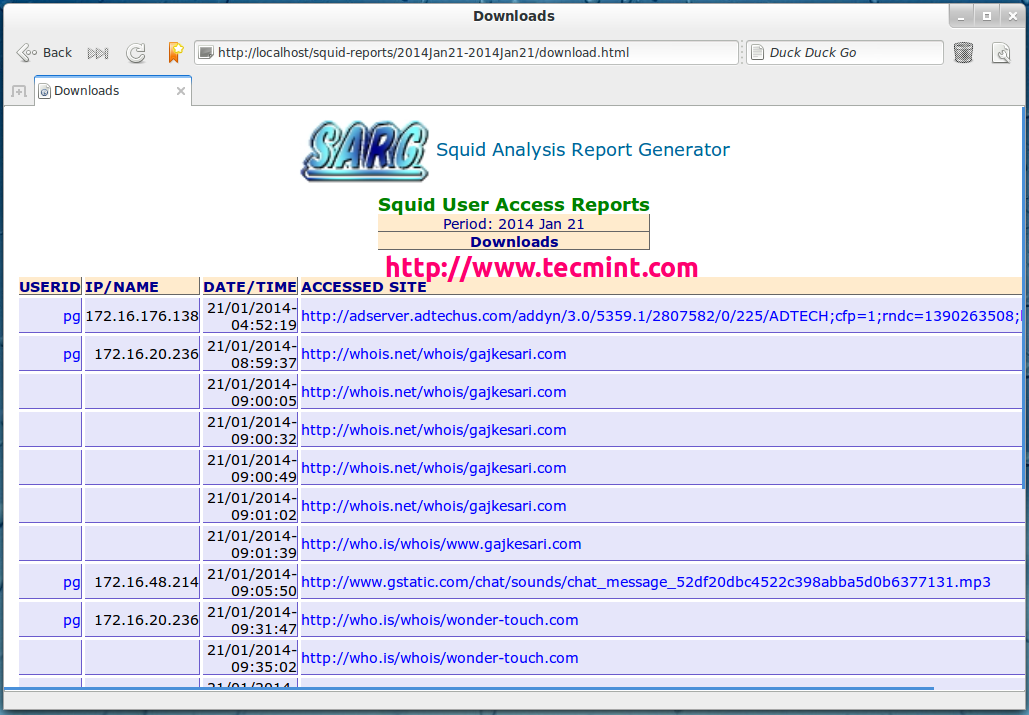
Step 22: Install SARG (Squid Analysis Report Generator and Internet Bandwidth Monitoring Tool)
1. Get pre-requisites:
# yum install –y gcc gd gd-devel make perl-GD wget httpd
2. Get the latest sarg source tarball, compile it, and install it:
--------a. Download latest version from here: http://sourceforge.net/projects/sarg/files/sarg/
--------b. # mkdir /root/sarg
--------c. Upload it via Webmin to /root/sarg directory
--------d. # tar -xvzf sarg-2.3.10.tar.gz
--------e. # cd sarg-2.3.10
--------f. # ./configure
--------g. # make
--------h. # make install
**Note: If make install command doesn't work, you may need to edit the 'configure' and 'config.status' files in the /root/sarg/sarg-2.3.10/ directory:
Search for '0.19' and change them to '0.18' in both files.
3. Edit Sarg config file: /usr/local/etc/sarg.conf
--------a. Uncomment/set the following lines:
----------------1. access_log /var/log/squid/access.log
----------------2. output_dir /var/www/html/squid-reports
----------------3. date_format u
----------------4. overwrite_report yes
--------b. Save.
4. Configure for Webmin:
--------a. In webmin, click “Un-used Modules” on left
--------b. Click “Squid Report Generator”
--------c. Click the “module configuration” link
--------d. Change path to SARG config to: /usr/local/etc/sarg.conf
--------e. Save.
5. Click “Refresh Modules” on bottom left of browser.
6. Refresh Webmin page.
7. Squid Report Generator should now be listed under Webmin Servers category on left.
Step 23: Configure Proxy Deployment (Active Directory & Group Policy)
This part is a bit big, so rather than making one huge 23rd step, I will split them up.. so all the remaining steps are part of this one, step 24 and on.
Step 24: Create two groups in active directory
1. “PROXY Users'
2. “PROXY Computers”
Step 25: Create three new Group Policy Objects (GPO)
1. 'Proxy Settings - PAC Assignment'
2. 'Proxy Settings - Autoconfig and Proxy - RESTRICTED'
3. 'Proxy Settings - Firefox Restrict Proxy Setting Changes'
Step 26: Configure GPO 1: Proxy Settings - PAC Assignment
*** This group policy will be responsible for configuring the automatic use of the proxy.pac script for client computers and users who are in the “PROXY Users” and “PROXY Computers” groups.
1. Go to User Configuration > Preferences > Control Panel Settings > Internet Settings > Create new Internet Explorer 10 preferences
2. In each tab, make sure there is a red underline under everything:
Highlight an option, and press the F8 key. This will put a red underline under each configurable option, which makes it not apply. We want to do this in each tab, for all settings we don’t want to preference.
3. In the “Connections” tab, click LAN Settings. Highlight an option and press the F5 key, which puts a green underline under each option. This sets these options as a preference.
4. UNCHECK “Automatically detect settings”.
5. CHECK “Use automatic configuration script”
6. In the Address: field, type: http://proxy-server.your.domain/proxy.pac (change to the name of your server (or web server) and domain)
7. Make sure “Use a proxy server for your LAN….” Is UNCHECKED.
8. Click OK.
*** Explained below, make these settings apply only to Users and Computers in the “PROXY Users” and “PROXY Computers” groups:
1. In the common tab, CHECK “Item-level targeting” and click the “Targeting.” button.
2. Add both “security groups”: “PROXY Users” and “PROXY Computers”:
3. Make sure it’s configured to say “the COMPUTER is a member of the security group DOMAINPROXY Computers” “OR the USER is a member of the security group DOMAINPROXY Users”
4. Click OK, then APPLY/OK.
5. Repeat all above steps for each version of IE you use in your environment. I have mine configured for IE 11, 10, and 8 and 9.
6. This group policy contains User settings, so it needs to be scoped in such a way that it will hit all users it will be targeted to. You can stick it in the root of your domain, or the root of where your users are in AD. The Item-level targeting will take care of the rest.
Step 27: Configure GPO 2: Proxy Settings - Autoconfig and Proxy - RESTRICTED
*** This group policy is going to “grey out” and restrict the “Automatic Configuration Settings” and “Proxy Settings” in the LAN Settings area of the Connections tab in “Internet Options”. This basically prevents users from changing the settings we are trying to restrict through Internet Options.
1. Go to Computer Configuration > Policies > Administrative Templates > Windows Components > Internet Explorer
2. Set the following policies to “ENABLED”:
a. “Disable changing Automatic Configuration settings”
b. “Prevent changing proxy settings”
3. Do the exact same thing in User Configuration > Policies > Administrative Templates > Windows Components > Internet Explorer
4. In the “Scope” tab of the GPO, remove the “Authenticated Users” entry and add the “PROXY Computers” and 'PROXY Users' groups instead.
5. Stick this GPO wherever it will hit all users and computers you plan on affecting with this GPO. You can place it in the root of your domain, and will only apply to the users and computers you have in the PROXY Computers/Users groups.
Step 28: Configure GPO 3: Proxy Settings - Firefox Restrict Proxy Setting Changes
*** This GPO forces users and computers in the two AD groups you created to use the configured proxy settings, and does not allow users to change them within Firefox. This took some serious creativity, but I got it working.
*** This first part of the step sets the permissions for 4 files below.
1. Go to: Computer Configuration > Policies > Windows Settings > Security Settings > File System --> Right-click File System > Add File.. copy in the following:
%ProgramFiles% (x86)Mozilla Firefoxdefaultspreflocal-settings.js
https://gist.github.com/tjgruber/10ab52b7cd1ef8d457096f3b6abaa556
2. Set the permissions like in the photo above. The idea is to remove all access to the files so they cannot be changed by users. So remove all permissions from those files via this GPO except what's pictured above. This includes removing local admins and users groups from the file permissions. We only want what's pictures.
3. Do the same thing for the following other files:
a. %ProgramFiles% (x86)Mozilla Firefoxmozilla.cfg
https://gist.github.com/tjgruber/5ddfc9a7826334931ae011ab1d69ad83
b. %ProgramFiles%Mozilla Firefoxdefaultspreflocal-settings.jss
c. %ProgramFiles%Mozilla Firefoxmozilla.cfg
Colors marathi tv serial ringtones free download. Only two files, but this GPO will place them in both 32 and 64 bit program files.
*** This second part of the step overwrites or places these files on client computers. First part does permissions, this one places the files.
1. Go to: Computer Configuration > Preferences > Windows Settings > Files --> Right-click Files > New > File
Configure like this:
Action: Update
Source file(s): your.domainSYSVOLyour.domainfilesfirefoxmozilla.cfg
Destination file: %ProgramFiles% (x86)Mozilla Firefoxmozilla.cfg
Suppress errors on individual file actions: Enabled
Read-only: Enabled
Hidden: Disabled
Archive: Disabled
2. Also do the above for each of the following entries:
Source file(s): your.domainSYSVOLyour.domainfilesfirefoxlocal-settings.js
Destination file: %ProgramFiles% (x86)Mozilla Firefoxdefaultspreflocal-settings.js
Source file(s) your.domainSYSVOLyour.domainfilesfirefoxmozilla.cfg
Destination file %ProgramFiles%Mozilla Firefoxmozilla.cfg
Source file(s) your.domainSYSVOLyour.domainfilesfirefoxlocal-settings.js
Destination file %ProgramFiles%Mozilla Firefoxdefaultspreflocal-settings.js
*** Note: Change the scope of this Group Policy.. In the “Scope” tab of the GPO, remove the “Authenticated Users” entry and add only the “PROXY Computers” group instead. This GPO only contains Computer settings.
Place this GPO in the root of the domain, or where it will effect all computers you plan on placing in the PROXY Computers group.
Now you should have a proxy server up and running, accessible via https://yourserver.your.domain:10000, and a shortcut to access it via http://yourserver.
I have set up a bunch of proxy servers this way, some two at a time for redundancy, and they work. This has been tried and tested for a long time.
If you cannot get something to work following my steps, it's possible I have a typo or missed something from my notes.
Please let me know so I can fix it so others don't run in to the same issue.
I appreciate receiving feedback, good or bad, and will do my best to help with issues and questions.
12 Comments
- Thai Peppermynameisjona May 3, 2016 at 03:03am
Nice! I was just looking into doing this on a virtual environment.
- Pimientojaime.colorado Jun 3, 2016 at 11:32pm
hello friend, tks for excelent tutorial. I have problems with entry localhost , does not resolve name machinne.
- Thai PepperObsolesce Jun 3, 2016 at 11:45pm
Hi Jaime.colorado,
I'm not sure what you mean. Could you give a little more detail and provide some screenshots?
- Thai PepperObsolesce Jun 4, 2016 at 02:37pm
Logonexpert service not running. Do you have a DNS A Record on your dns server called serv-proxy1 pointing to it's IP address?
- Pimientojaime.colorado Jun 4, 2016 at 02:47pm
thank you for your valuable help.
do not.
How I can create a DNS record ?.
could help me with the location of the file. - Thai PepperObsolesce Jun 4, 2016 at 03:05pm
You create that on your DNS server. If you don't have a dns server, you will need to always use the ip address instead of the name serv-proxy1. DNS servers are commonly installed on the domain controller.
- Pimientojaime.colorado Jun 4, 2016 at 05:05pm
Tim_G , the new, Thank you for excelent manual. regards from Colombia
- Pimientojaime.colorado Jun 6, 2016 at 03:16am
hello friend tim, How I can to configure Squid basic authentication? no this The route /usr/lib64/squid/ncsa_auth,.
by webmin / External Auth REQUIRED the error is:
'Can't use proxy auth because no authentication schemes are fully configured. FATAL: ERROR: Invalid ACL: acl passx proxy_auth REQUIRED'
- Jalapenojhavens Jan 26, 2017 at 07:01pm
Tim_G
I was recommended to use ICAP as an add-on for Squid. The documentation I was pointed to is located athttps://docs.diladele.com/administrator_guide_4_9/install/index.html
I would consider myself an intermediate Linux guy. I've messed around with a few desktop distros, and spun up a few Debian, Ubuntu, and CentOS servers. Do you know anything about ICAP. If you were to glance at the link provided, do you feel the guidance is accurate and/or would produce a working web filter server? I know you must be very busy, and I'm not expecting any kind of full on awesomely detailed report like the one you posted here. Any kind of intel or guidance you could provide would be appreciated.
Thank you Sir.
- Jalapenojhavens Jan 26, 2017 at 08:59pm
Does squid require two NICs? Or can it be used with only one?
- Thai PepperObsolesce Jan 26, 2017 at 10:07pm
Squid does not require 2 NICs. I have some squid proxy servers running as VM's on Hyper-V only using one nic.
As for that link to that ICAP software, I'm not familiar with it. You could use your own block lists or DNS in squid that do the same thing.
- PimientoMax7823 Feb 11, 2018 at 03:12am
hey Tim_G . I did fallow all the steps. But some pages are going through the firewall within the whitelist. Any suggestion?